Okay, so here's another write-up of an easy job, for which there is no write-up.
I just did the "Sixlitre" ignition upgrade and timing bump to my `94 5.0. Here's how:
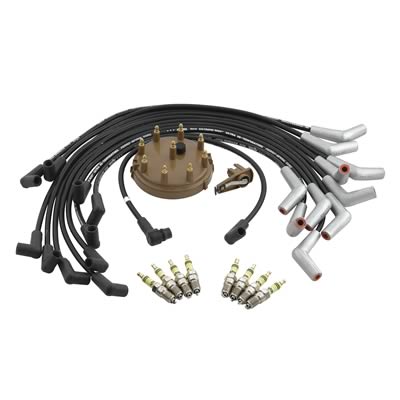
Start by buying the wires, cap, rotor, and coil. These are the parts for a `94 5.0:

(To be entirely accurate, the wires shown are for *most* `94 5.0s. They happened to be wrong for mine, which for some unknown reason took the wireset for a Lightning 5.8 HO.)
You'll also want some cheap copper sparkplugs (Motorcraft are fine.)
Next, disconnect the negative cable on your battery.

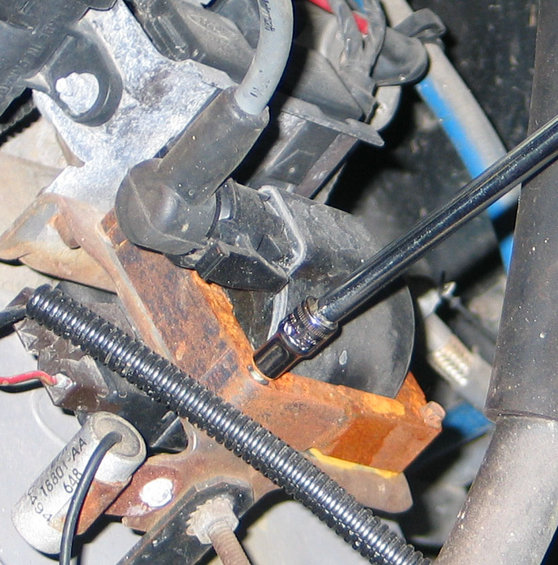
Unscrew and unplug the old coil. Mine took a 5.5mm wrench.
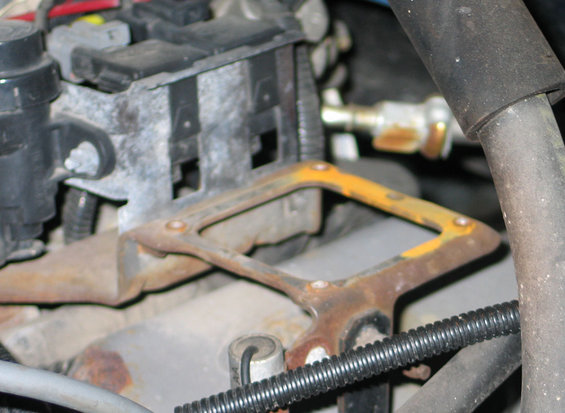
Here's the empty coil bracket.
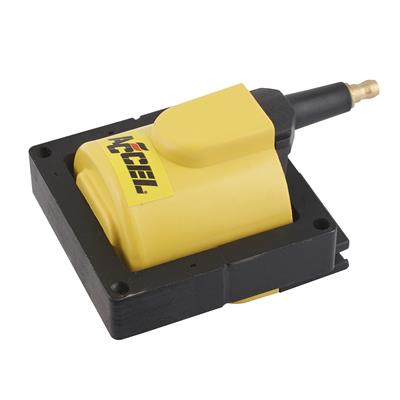
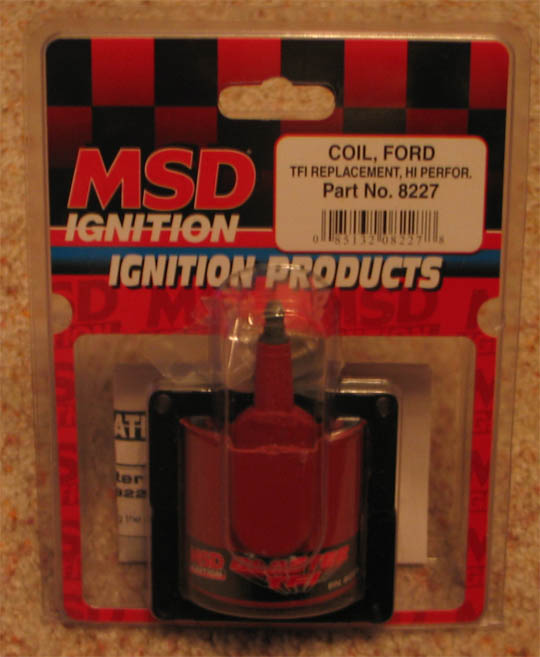
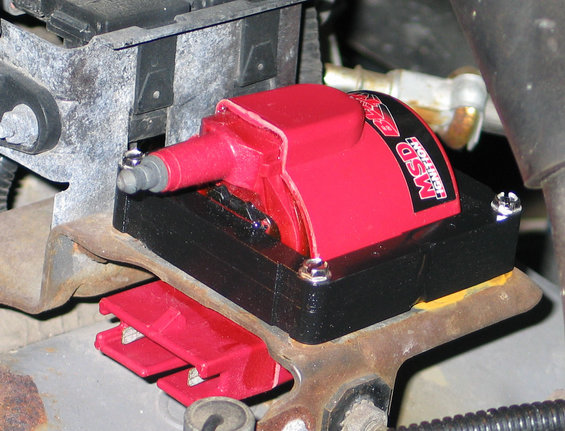
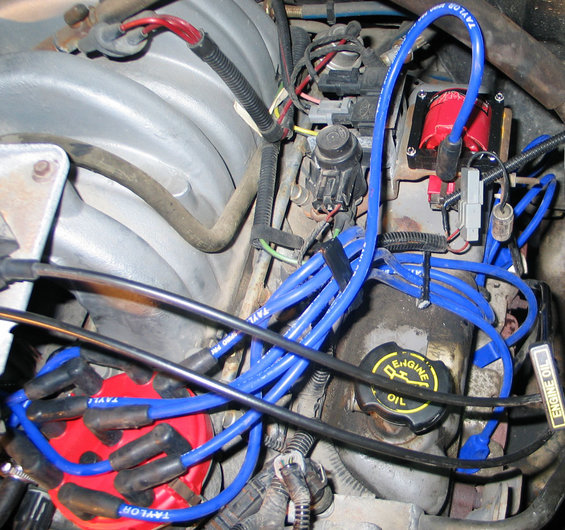
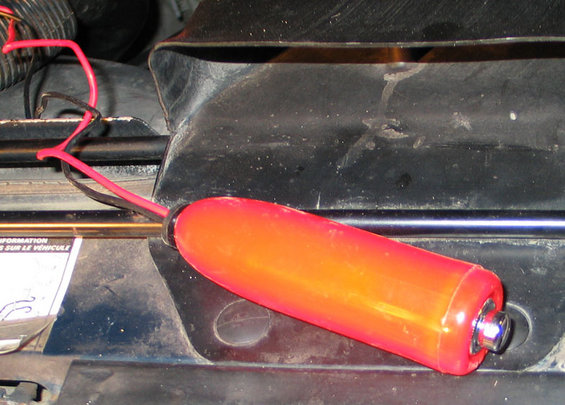
And here it is filled with bright red goodness. This just drops in, and plugs right back into the same place as the old one.
Since I'm paranoid about making too many changes to a system at once, I re-connected the battery after changing the coil and fired up the engine, just to make sure it started. Remember to disconnect the battery again.
(It's a lot easier to work on the cap and wires if you take off the intake tube. Mine's MAF, so I had 2 hose clamps on the throttle body, one on the air cleaner box, and one on the back of the oil fill neck. YMMV.)
Remove your tired old distributor cap by unclipping the (rusty) spring clips on the sides. There are two of them. The one on the right is shown unclipped here.

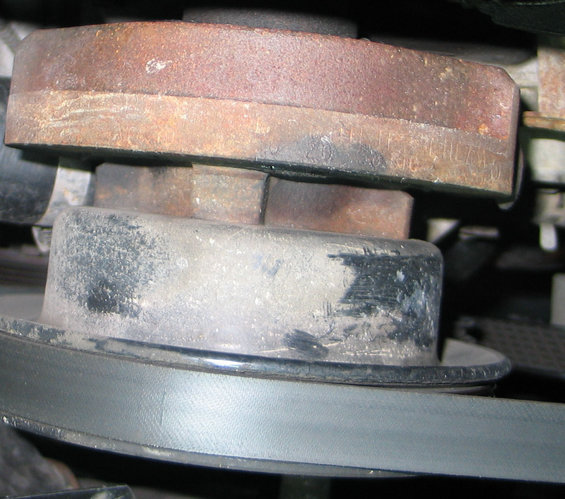
Underneath is your rotor. It lifts straight off the shaft, which is keyed so the new one only goes on one way.

Again, paranoia. I transferred all my old wires to the new cap, and started the truck again, just to be sure.

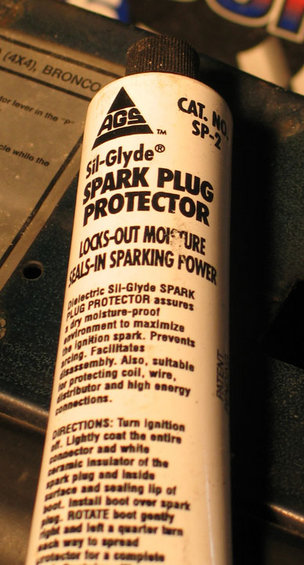
I use liberal amounts of dielectric grease in my spark plug wires, so I buy big tubes of it. Works as brake caliper lubricant, too.
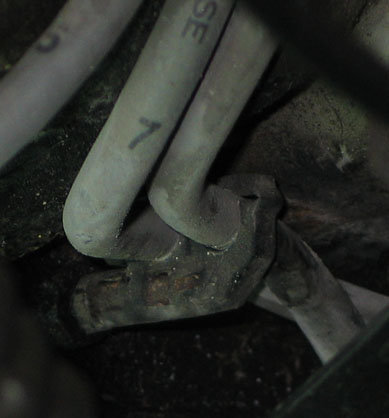
Some of the original wire looms are very hard to deal with. This one, for the 7&8 pair of wires, is mounted on a stud next to the valve cover. If you grab it with a pair of pliers, and pull it directly parallel to the side of the valve cover, it'll pop right off the stud, then you can open it. There's another just like it on the other side for the 3&4 cylinders.
You're supposed to do the plug wires one at a time, so that you don't get them mixed up. That didn't work for me, all of them were too long, and if I went with what fit the first 4 or 5, I ended up with wires that were a foot or more too long. I ended up pulling off all 8, sorting them by length, then sorting the new ones by length, and matching them up that way. When you're putting them back on, remember that cylinder 1 is the front cylinder on the passenger side, and 5 is the front cylinder on the driver side.
As I replaced the wires, I pulled each plug and re-gapped it to .055 inches. No pics, sorry. It's not that hard, though a universal joint, a selection of extension lengths, and some caution so that you don't cross-thread the head when re-installing them are all good ideas. I had just put these plugs in, they were platinum motorcrafts that I didn't want to throw away. With this ignition setup, though, plain copper Motorcrafts would work fine, and as long as you are doing all these changes, put some new plugs in. The .055 gap is what we're doing all this stuff for anyway.
edit: Here's pics and how-to for the spark plugs: https://www.fullsizebronco.com/forum/showthread.php?p=1086609
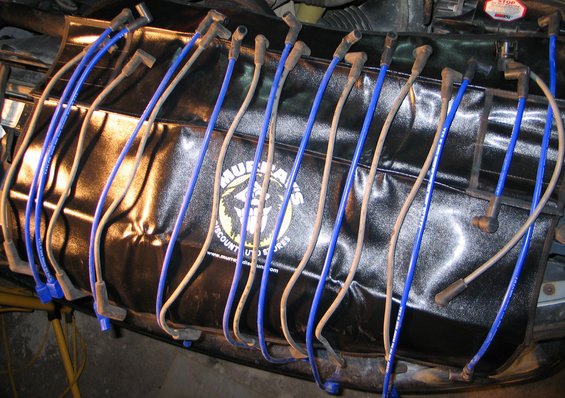
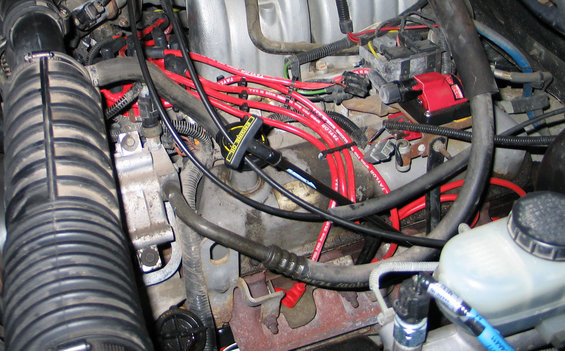
Here's the end result of the too-long set of wires. Pretty, no? No. I didn't think so.
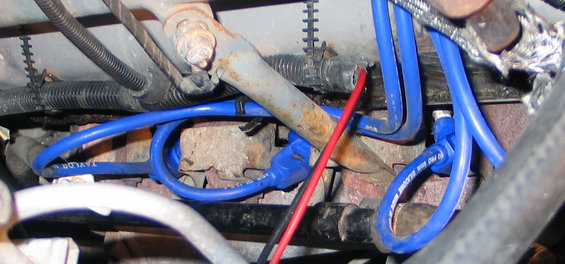
Taylor told me what part number to get, and Summit sent out the Lightning 5.8 HO set, which fits *much* better. (Note: I also replaced several of the wirelooms with some from Mr. Gasket.)
Okay, the reason we did all that work was to get the fatter spark from the new coil jumping that longer (.055 vs. .042) gap, so that we can bump the timing up a bit and get a little more power/efficiency. So, here's how to set the timing on the 5.0:
First off, for those who don't know, timing is what controls when the sparkplug fires in comparison to where the piston is in the cylinder. You want it to fire while the piston is still compressing the fuel-air mixture, just before it starts going back down. When the piston is at the very top of the stroke, that's called Top Dead Center (TDC). Normal base timing for the `94 5.0 is 10 degrees BTDC (Before TDC). That means that the sparkplug fires when the crank still has 10 degrees to turn before reaching TDC. That's what the factory chose for the most efficient burn. With this enhanced ignition system, we can fire even earlier than that, and burn even more of the fuel, more completely.
First thing to do is to make the timing marks readable. There are two parts to the timing marks: The degree marks on the harmonic balancer (on the front end of the crankshaft, behind the main pulley), and the pointer (fixed to the block). We'll make the degree marks readable first. Get out your remote start switch, and connect it across the starter solenoid.

Edit: The above picture is the WRONG way to hook up the remote starter. Your remote starter switch's wires will melt, since all the draw of the starter is going through the switch. Here's the right way:

One of the connectors is on the +12 pole, the other is on the energizing contact (pull off the small wire at the top of the solenoid, hook up there). You can see the connector I pulled off near the tapered end of the red connector (the black L shaped thing). Thanks to collinsperformance for pointing out the error of my ways. end of edit
Disconnect the coil wire so the engine won't start.

While you're at it, put the parking brake on, chock the wheels, and make sure the transmission is in Park (neutral if a stick shift).
Stand off to the side and hit the remote starter switch a couple of times, make sure that the engine turns over *without* the truck leaping forward and crushing you to death.
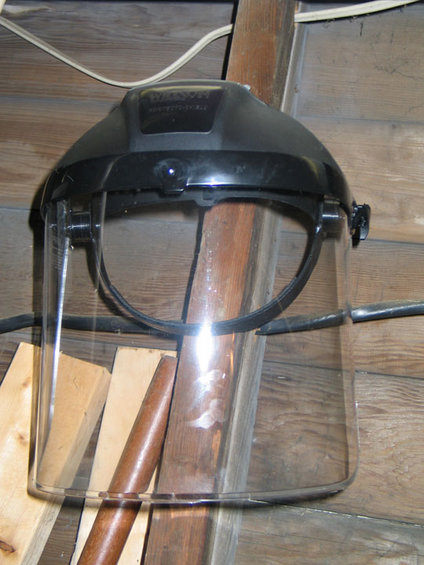
Put on some eye protection. I like the faceshield because it keeps the rust out of my mouth.
Once you're pretty sure you're not going to kill yourself, crawl under and lay on your back under the front of the truck. Feed the starter switch down to where you can use it (keeping the cables out of the belt and fan), and bump the engine around until you can see the degree marks on the harmonic balancer.
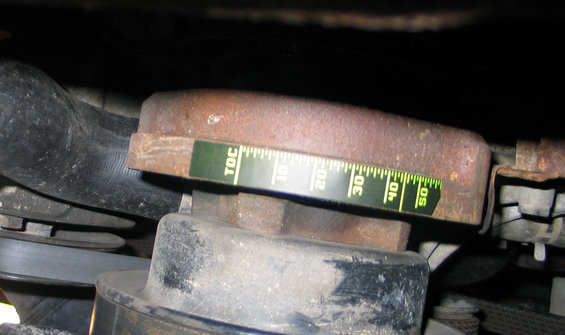
Make them visible. You could clean and paint them (what I wish I'd done), or you could put on a timing tape, like I did. (I only used part of it, because I couldn't get it all on, and only needed part of it.)
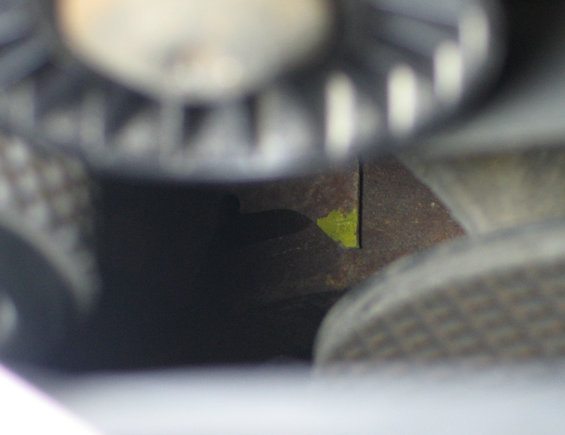
Go back up top, disconnect the remote starter switch. Reach in with a paint pen or a q-tip or something and paint the end of the pointer. (For reference, at the top of this picture is the bottom of the idler pulley, at the bottom left is the top of the tensioner pulley, and at the bottom right is the top of the water pump pulley.)
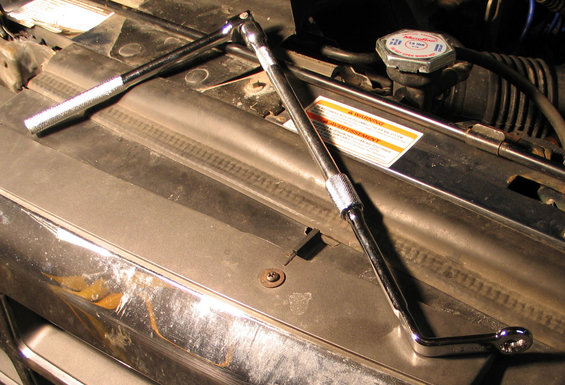
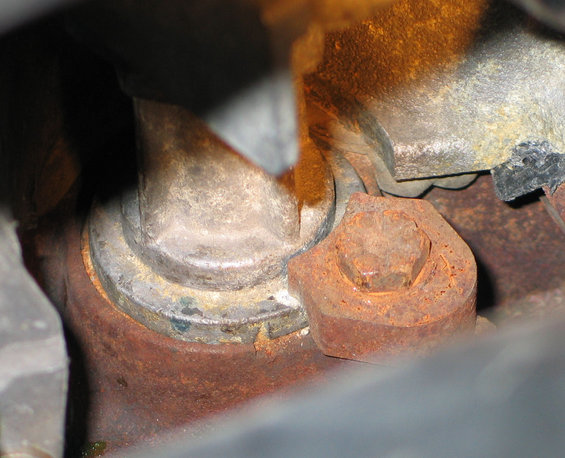
Okay, now that the marks are visible, we'll get to the actual timing. Up and to the right of the last picture is the distributor clamp bolt. It's a half-inch on mine.

I used this nifty dogleg wrench to turn it.
Don't loosen it yet, though, we need to warm up the engine. Put everything back on that you took off (neg battery cable, coil wire, intake tube), and fire it up. Let it get up to normal operating temperatures. Wait for the thermostat to open (when the top radiator hose goes hot). Shut it down.
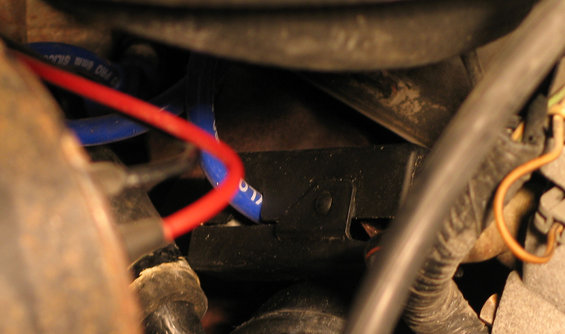
Find your SPOUT connector. Here's mine, the light gray thing in the red circle. That thing above it is the cruise control servo. It's in the rear driverside corner of the engine compartment. Just unlatch the latches, pull the gray tab out of the connector, and put it somewhere safe.

Hook up your timing light. It gets its power from the battery, and picks up its signal from the #1 sparkplug wire. Here's the power hookup:

And here's the signal pickup clamped around the #1 wire:
(a little hard to see, but it'll be obvious when it's in your hands)
Watch your wires so they don't get into the fan or belt. Point the timing light at the timing pointer, start up the engine, and the strobe light in the timing light will fire every time the #1 cylinder fires, "freezing" the view in place so that you can read the timing setting. (You'd be amazed how hard it was to get this shot with an auto-focusing digital camera.)

Shut down the engine. Loosen the distributor clamp bolt that we discussed earlier, just enough that it allows the distributor to turn. Rotate the distributor (just grab it by the cap and turn it) clockwise to advance the timing (advance means go further BTDC, so 11 BTDC is 1 degree advanced from 10 BTDC). You're shooting for about 13 or 13.5 degrees. The picture above shows 13 degrees.
Start up again and check the timing. Shut down and tighten the clamp bolt back down when you've got the timing where you want it. Here you can see how little we actually turned the distributor (small white mark used to be under the clamp bolt).
The bolt doesn't have to be super tight, just enough so that the timing doesn't change on its own and the bolt doesn't loosen on its own.
Put the SPOUT connector back in. Check all your connections and make sure that you have re-attached everything you detached.
Take it out for a spin. Hopefully your mileage and performance will both be improved. If you hear any "pinging" (a rattling sound from the engine), especially during acceleration, you may have advanced the timing too far. Back it off a little.
Hope this helps someone.
I just did the "Sixlitre" ignition upgrade and timing bump to my `94 5.0. Here's how:
Start by buying the wires, cap, rotor, and coil. These are the parts for a `94 5.0:
(To be entirely accurate, the wires shown are for *most* `94 5.0s. They happened to be wrong for mine, which for some unknown reason took the wireset for a Lightning 5.8 HO.)
You'll also want some cheap copper sparkplugs (Motorcraft are fine.)
Next, disconnect the negative cable on your battery.
Unscrew and unplug the old coil. Mine took a 5.5mm wrench.
Here's the empty coil bracket.
And here it is filled with bright red goodness. This just drops in, and plugs right back into the same place as the old one.
Since I'm paranoid about making too many changes to a system at once, I re-connected the battery after changing the coil and fired up the engine, just to make sure it started. Remember to disconnect the battery again.
(It's a lot easier to work on the cap and wires if you take off the intake tube. Mine's MAF, so I had 2 hose clamps on the throttle body, one on the air cleaner box, and one on the back of the oil fill neck. YMMV.)
Remove your tired old distributor cap by unclipping the (rusty) spring clips on the sides. There are two of them. The one on the right is shown unclipped here.
Underneath is your rotor. It lifts straight off the shaft, which is keyed so the new one only goes on one way.
Again, paranoia. I transferred all my old wires to the new cap, and started the truck again, just to be sure.
I use liberal amounts of dielectric grease in my spark plug wires, so I buy big tubes of it. Works as brake caliper lubricant, too.
Some of the original wire looms are very hard to deal with. This one, for the 7&8 pair of wires, is mounted on a stud next to the valve cover. If you grab it with a pair of pliers, and pull it directly parallel to the side of the valve cover, it'll pop right off the stud, then you can open it. There's another just like it on the other side for the 3&4 cylinders.
You're supposed to do the plug wires one at a time, so that you don't get them mixed up. That didn't work for me, all of them were too long, and if I went with what fit the first 4 or 5, I ended up with wires that were a foot or more too long. I ended up pulling off all 8, sorting them by length, then sorting the new ones by length, and matching them up that way. When you're putting them back on, remember that cylinder 1 is the front cylinder on the passenger side, and 5 is the front cylinder on the driver side.
As I replaced the wires, I pulled each plug and re-gapped it to .055 inches. No pics, sorry. It's not that hard, though a universal joint, a selection of extension lengths, and some caution so that you don't cross-thread the head when re-installing them are all good ideas. I had just put these plugs in, they were platinum motorcrafts that I didn't want to throw away. With this ignition setup, though, plain copper Motorcrafts would work fine, and as long as you are doing all these changes, put some new plugs in. The .055 gap is what we're doing all this stuff for anyway.
edit: Here's pics and how-to for the spark plugs: https://www.fullsizebronco.com/forum/showthread.php?p=1086609
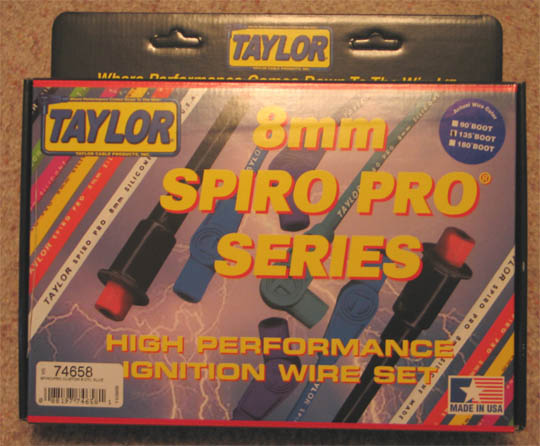
Here's the end result of the too-long set of wires. Pretty, no? No. I didn't think so.
Taylor told me what part number to get, and Summit sent out the Lightning 5.8 HO set, which fits *much* better. (Note: I also replaced several of the wirelooms with some from Mr. Gasket.)
Okay, the reason we did all that work was to get the fatter spark from the new coil jumping that longer (.055 vs. .042) gap, so that we can bump the timing up a bit and get a little more power/efficiency. So, here's how to set the timing on the 5.0:
First off, for those who don't know, timing is what controls when the sparkplug fires in comparison to where the piston is in the cylinder. You want it to fire while the piston is still compressing the fuel-air mixture, just before it starts going back down. When the piston is at the very top of the stroke, that's called Top Dead Center (TDC). Normal base timing for the `94 5.0 is 10 degrees BTDC (Before TDC). That means that the sparkplug fires when the crank still has 10 degrees to turn before reaching TDC. That's what the factory chose for the most efficient burn. With this enhanced ignition system, we can fire even earlier than that, and burn even more of the fuel, more completely.
First thing to do is to make the timing marks readable. There are two parts to the timing marks: The degree marks on the harmonic balancer (on the front end of the crankshaft, behind the main pulley), and the pointer (fixed to the block). We'll make the degree marks readable first. Get out your remote start switch, and connect it across the starter solenoid.
Edit: The above picture is the WRONG way to hook up the remote starter. Your remote starter switch's wires will melt, since all the draw of the starter is going through the switch. Here's the right way:
One of the connectors is on the +12 pole, the other is on the energizing contact (pull off the small wire at the top of the solenoid, hook up there). You can see the connector I pulled off near the tapered end of the red connector (the black L shaped thing). Thanks to collinsperformance for pointing out the error of my ways. end of edit
Disconnect the coil wire so the engine won't start.
While you're at it, put the parking brake on, chock the wheels, and make sure the transmission is in Park (neutral if a stick shift).
Stand off to the side and hit the remote starter switch a couple of times, make sure that the engine turns over *without* the truck leaping forward and crushing you to death.
Put on some eye protection. I like the faceshield because it keeps the rust out of my mouth.
Once you're pretty sure you're not going to kill yourself, crawl under and lay on your back under the front of the truck. Feed the starter switch down to where you can use it (keeping the cables out of the belt and fan), and bump the engine around until you can see the degree marks on the harmonic balancer.
Make them visible. You could clean and paint them (what I wish I'd done), or you could put on a timing tape, like I did. (I only used part of it, because I couldn't get it all on, and only needed part of it.)
Go back up top, disconnect the remote starter switch. Reach in with a paint pen or a q-tip or something and paint the end of the pointer. (For reference, at the top of this picture is the bottom of the idler pulley, at the bottom left is the top of the tensioner pulley, and at the bottom right is the top of the water pump pulley.)
Okay, now that the marks are visible, we'll get to the actual timing. Up and to the right of the last picture is the distributor clamp bolt. It's a half-inch on mine.
I used this nifty dogleg wrench to turn it.
Don't loosen it yet, though, we need to warm up the engine. Put everything back on that you took off (neg battery cable, coil wire, intake tube), and fire it up. Let it get up to normal operating temperatures. Wait for the thermostat to open (when the top radiator hose goes hot). Shut it down.
Find your SPOUT connector. Here's mine, the light gray thing in the red circle. That thing above it is the cruise control servo. It's in the rear driverside corner of the engine compartment. Just unlatch the latches, pull the gray tab out of the connector, and put it somewhere safe.
Hook up your timing light. It gets its power from the battery, and picks up its signal from the #1 sparkplug wire. Here's the power hookup:
And here's the signal pickup clamped around the #1 wire:
(a little hard to see, but it'll be obvious when it's in your hands)
Watch your wires so they don't get into the fan or belt. Point the timing light at the timing pointer, start up the engine, and the strobe light in the timing light will fire every time the #1 cylinder fires, "freezing" the view in place so that you can read the timing setting. (You'd be amazed how hard it was to get this shot with an auto-focusing digital camera.)
Shut down the engine. Loosen the distributor clamp bolt that we discussed earlier, just enough that it allows the distributor to turn. Rotate the distributor (just grab it by the cap and turn it) clockwise to advance the timing (advance means go further BTDC, so 11 BTDC is 1 degree advanced from 10 BTDC). You're shooting for about 13 or 13.5 degrees. The picture above shows 13 degrees.
Start up again and check the timing. Shut down and tighten the clamp bolt back down when you've got the timing where you want it. Here you can see how little we actually turned the distributor (small white mark used to be under the clamp bolt).
The bolt doesn't have to be super tight, just enough so that the timing doesn't change on its own and the bolt doesn't loosen on its own.
Put the SPOUT connector back in. Check all your connections and make sure that you have re-attached everything you detached.
Take it out for a spin. Hopefully your mileage and performance will both be improved. If you hear any "pinging" (a rattling sound from the engine), especially during acceleration, you may have advanced the timing too far. Back it off a little.
Hope this helps someone.
")